Dropping your iPhone in water can be very stressful. It might happen in a sink, bathtub, or during a rain shower. Quick action is crucial to prevent damage.
I will show you how to safely remove water from your iPhone. This will help it work again. As an iPhone user, it’s key to follow the right steps to recover your device.
Acting fast and using the right methods can save your iPhone. In this guide, we’ll look at the best ways for iPhone water removal and drying out your device.
Key Takeaways
- Act quickly to minimize water damage to your iPhone.
- Follow the right procedures for iPhone water removal.
- Use effective methods to dry out your iPhone.
- Understand the importance of immediate action.
- Learn the best techniques for recovering your device.
Understanding iPhone Water Damage
It’s important for iPhone users to know how water damage works. Water can cause minor problems or even make your phone stop working. Knowing how water affects your phone and its water resistance is key.
How Water Affects iPhone Components
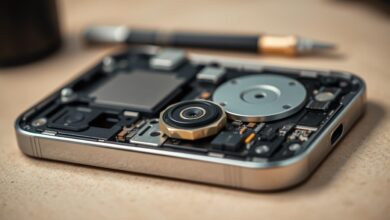
Water can harm your iPhone’s inside parts, leading to short circuits and irreparable damage. When water hits your phone’s electronics, it can rust metal parts, damage the screen, and mess up how your phone works. Fixing water damage can be expensive and hard, so act fast if your phone gets wet.
Water Resistance Ratings by iPhone Model
Each iPhone model has a different water resistance level, shown by its IP rating. For example, newer iPhones like the iPhone 13 have a higher IP rating, which means they can handle more water. Knowing your phone’s IP rating helps you understand its water resistance and how to protect it. If your iPhone gets damaged by water, you might need to get it fixed by a pro.
Act Fast: Immediate Steps After Water Exposure
When your iPhone gets wet, time is of the essence. Quick action is key to avoid lasting harm.
Power Off Your iPhone Immediately
The first thing to do is turn off your iPhone right away. This step stops short circuits that could harm it more. Press and hold the sleep/wake button until you see “slide to power off.” Then, slide it to the right. Don’t press any other buttons or charge it until it’s dry.
Remove Case and Accessories
Then, take off any case or accessories. This makes drying your iPhone easier and stops water from causing more damage. Remove any covers, SIM card trays, or other attachments carefully.
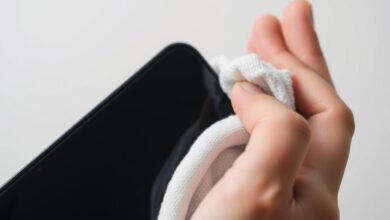
Wipe External Moisture
Use a soft, lint-free cloth to wipe your iPhone. This removes moisture from the outside. Be gentle to avoid pushing water into openings. You can also use a desiccant or dry cloth to soak up moisture. Here’s what to do:
- Gently pat the exterior dry
- Use a dry cloth to absorb moisture
- Avoid using heat sources like hair dryers
By acting fast, you can greatly increase your iPhone’s chances of recovery from water damage.
Assessing the Severity of Water Damage
It’s important to know how much water damage your iPhone has. The kind of water and how long it was exposed affect the damage. Knowing this helps find the best iPhone water damage solution.
Fresh Water vs. Salt Water Exposure
Water type matters a lot for iPhone damage. Freshwater is less harmful than saltwater, which has salt that can damage more. If your iPhone got saltwater, act fast to lessen damage.
Freshwater is still serious but might be less bad if fixed quickly. Always dry your iPhone fast to avoid more harm.
Checking the Liquid Contact Indicator
Most iPhones have a Liquid Contact Indicator (LCI). It’s inside the SIM card tray or on the logic board. When it meets water, it turns red or pink.
Checking the LCI tells you if your iPhone touched water, even if you can’t see damage. If it’s changed color, your iPhone was in water. You should get a water in iPhone fix right away.
Using the iPhone’s Built-in Water Ejection Feature
Many iPhone users don’t know their device has a built-in water ejection feature. It’s great for getting water out after accidents, like being dropped in water or caught in the rain. The feature works by playing a sound that pushes water out of the iPhone’s speakers.
How to Access Water Eject Shortcuts
To use the water ejection feature, you need the Shortcuts app on your iPhone. If you don’t have it, you can get it from the App Store. After installing, you can make a shortcut to play the water ejection sound. Here’s how:
- Open the Shortcuts app and create a new shortcut.
- Search for “Play Sound” and select it.
- Choose the water ejection sound (find it online or in shortcut libraries).
- Save the shortcut and run it to eject water from your iPhone.
As Apple advises, this feature helps remove water but use it carefully to avoid damage.
Limitations of the Built-in Feature
The built-in water ejection feature is useful but has limits. It mainly helps with water in the speakers and might not work for water deeper in the device. It also won’t help if water gets in through other ports or if the device is submerged for too long.
“The built-in water ejection feature is a useful tool, but it should not be relied upon as the sole method for removing water from your iPhone.”
Remember, this feature is not a replacement for drying and repair. If your iPhone gets wet, take it to a pro for inspection and repair to avoid lasting damage.
How to Get Water Out a iPhone Using Rice Method
Drying an iPhone with rice is a simple and affordable method. It involves putting your iPhone in a rice-filled container to soak up moisture. While it’s not perfect, it’s a good first step to try and save your device after it gets wet.
Preparing the Rice Drying Container
You’ll need a big container to hold your iPhone and cover it with rice. A plastic storage bin or a bowl works great. Fill it with uncooked rice, making sure it covers your iPhone. The rice pulls moisture out of your device.
Key steps to prepare the container:
- Choose a container that’s airtight to prevent moisture from entering.
- Fill the container with enough rice to submerge your iPhone.
- Ensure the rice is dry and not contaminated with other substances.
Proper Placement and Duration
Put your iPhone in the rice, making sure it’s fully covered. Leave it there for at least 48 to 72 hours. This gives the rice enough time to soak up the moisture. Be patient and don’t rush this step.
Effectiveness and Limitations
The rice method works well for minor water damage. But, it’s not a sure thing. Its success depends on how much water damage there is and how fast you act. It’s a cheap and easy home fix, but might not work for serious damage.
Consider the following:
- The type of water your iPhone was exposed to (fresh, salt, or contaminated water).
- The duration your iPhone was submerged.
- The model’s water resistance rating.
Knowing these things helps you figure out if the rice method will work for you.
Silica Gel Method for Water Extraction
Silica gel is a top-notch desiccant for drying a wet iPhone. It’s great for fixing a water-damaged iPhone because it sucks up moisture well. This helps avoid corrosion and more harm.
Where to Find Silica Gel Packets
You can find silica gel packets in many places. They’re in packaging for electronics, clothes, and food. You can also buy them online or at hardware stores. Having these packets is key when you need to iPhone water damage fix.
Setting Up the Drying Environment
To use silica gel, put your iPhone in a container with the packets. Make sure the iPhone is fully covered and seal the container. This setup helps the silica gel dry your iPhone evenly.
Why Silica Outperforms Rice
Silica gel beats rice for drying a wet iPhone because it absorbs more moisture. Rice can leave dust and starch, but silica gel is cleaner and better. If you want to fix a water damaged iPhone, choose silica gel.
| Drying Method | Effectiveness | Cleanliness |
|---|---|---|
| Silica Gel | High | High |
| Rice | Moderate | Low |

Using Compressed Air to Remove Water
Compressed air can help remove water from your iPhone if used right. It’s good for pushing water out of ports and openings without harming your device. It works best when you use it with other drying methods.
Safe Compressed Air Techniques
When using compressed air, don’t spray it too close to your iPhone’s inside parts. Hold the can straight up to keep liquids out. Use short, soft bursts of air to get rid of water. Avoid tilting the can or shaking it, as this can push more moisture in or damage your device.
- Keep the can at least 6 inches away from the iPhone.
- Use compressed air in a well-ventilated area.
- Limit each burst to a second or less to avoid excessive pressure.
Ports and Openings to Target
The main spots to aim with compressed air are the iPhone’s charging port, SIM card slot, and speakers. Water usually gathers in these spots. Careful blasts of compressed air can help clear it out. Be careful around the screen and camera lenses as they are very sensitive.
By focusing on these spots and using compressed air wisely, you can boost your chances of getting water out of your iPhone. This method, when combined with others, can be a key part of fixing water damage.
Vacuum Method for Water Extraction
Using a vacuum can be a surprisingly effective way to extract water from your iPhone. This method involves creating a low-pressure environment. It draws out moisture from the device’s internal components.
Low-Pressure Vacuum Setup
To set up a low-pressure vacuum, you’ll need a vacuum chamber or a container that can be sealed. Place your iPhone inside, ensuring it’s not touching the sides or bottom. Create a small opening to connect a vacuum pump, and slowly reduce the pressure inside the chamber. This method can be particularly effective for drying out an iPhone with water damage.
Some key considerations for the setup include:
- Using a vacuum pump capable of creating a low-pressure environment
- Ensuring the iPhone is not in direct contact with the container walls
- Monitoring the pressure gauge to avoid extreme pressure changes
Safety Precautions When Using Vacuums
When using a vacuum to dry your iPhone, it’s crucial to take safety precautions to avoid causing further damage. Extreme pressure changes can harm internal components, so it’s essential to monitor the pressure gauge closely. Additionally, be cautious not to touch any internal components with the vacuum nozzle or other objects, as this can cause physical damage.
Some safety precautions to keep in mind include:
- Avoiding extreme pressure changes
- Not touching internal components with the vacuum nozzle
- Ensuring the vacuum is set up correctly to avoid causing further damage
Scenario-Specific Recovery Techniques
Understanding the type of water damage your iPhone has suffered is key to fixing it. Different situations need different fixes. Knowing these can greatly improve your iPhone’s chances of recovery.
Toilet or Sink Submersion
If your iPhone fell into a toilet or sink, grab it fast and turn it off right away. Fresh water is better than salt water, but you must act quickly. Use the water ejection feature or desiccants like silica gel to remove water.
Be extra careful with toilet water because of harmful contaminants. Clean the outside well.
Pool or Beach Water Exposure
Pool or beach water is very harmful because of salt and chlorine. Salt water can really damage your iPhone’s inside parts. Rinse it with fresh water to get rid of salt or chlorine before drying.
Then, use silica gel packets to dry it out. The sooner you do this, the better your iPhone will recover.
Rain or Drink Spills
For minor spills like rain or drinks, the damage is usually less. Quickly wiping it down and using the water ejection feature can help. But if water got deep inside, you might need desiccants or other drying methods.

| Exposure Type | Immediate Action | Drying Method |
|---|---|---|
| Toilet/Sink Submersion | Turn off immediately, clean exterior | Built-in ejection, silica gel |
| Pool/Beach Water | Rinse with fresh water | Silica gel, compressed air |
| Rain/Drink Spills | Wipe down exterior | Built-in ejection, desiccants |
Knowing how to fix your iPhone for different water damage situations can really help. Quick action and the right methods can save your device.
Common Mistakes to Avoid When Drying Your iPhone
Many iPhone users make big mistakes when trying to dry their wet devices. These errors can cause more harm, making repairs harder or even making the device unusable. Knowing what to avoid is key to fixing your iPhone.
Heat Sources and Hair Dryers
One big mistake is using heat or hair dryers to dry your iPhone. It might seem like a good idea to use heat to dry it out. But, heat can damage the inside parts, warp the circuit boards, or melt the display’s glue.
Instead of using heat, let your iPhone air dry naturally. Using a hair dryer or other heat source can push water deeper into the device. This can cause more damage to the sensitive internal components.
Shaking or Excessive Movement
Another mistake is shaking your iPhone hard or moving it too much. This can spread water to other parts, reaching areas that were dry. Shaking can also damage internal connections or break mechanical parts.
Premature Power-On Attempts
Trying to turn on your iPhone too soon after it gets wet is a big mistake. Turning it on can cause a short circuit, leading to permanent damage. Wait until you’re sure it’s dry before trying to turn it on.
| Mistake | Consequence | Recommended Action |
|---|---|---|
| Using heat sources or hair dryers | Damage to internal components, warping of circuit boards | Let the device air dry naturally |
| Shaking or excessive movement | Spreading water to dry areas, loosening internal connections | Gently pat dry the exterior, avoid shaking |
| Premature power-on attempts | Short circuits, irreversible damage | Wait until the device is dry before powering on |
By avoiding these mistakes, you can greatly improve your iPhone’s chances of recovery from water damage. Being patient and careful is crucial when dealing with a wet iPhone.
When to Seek Professional Repair Services
When DIY fixes don’t work for your water-damaged iPhone, it’s time to call a pro. Even with the best DIY tricks, some problems need a pro’s touch to fix. This ensures your device works like new again.
Signs That DIY Methods Aren’t Working
If drying your iPhone with rice or silica gel doesn’t solve the problem, you need a pro. Signs that DIY isn’t enough include a non-working screen, bad audio, or corrosion. If you see these signs, get professional help to avoid more damage.
Also, if DIY repairs scare you or the damage is too much, go for a pro. Experts can handle complex water damage fixes, like iPhone water damage fix and water in iPhone fix.
Finding Reputable iPhone Repair Services
To find a good iPhone repair service, start by looking up local shops and reading reviews. Choose services that focus on water damage and know your iPhone model. Make sure they use real parts and offer a repair warranty. Check if they’re Apple authorized or have good reviews online.
Getting professional help when needed ensures your iPhone gets the best care. This boosts the chances of a successful iPhone water damage fix.
Testing Your iPhone After Water Removal
After trying to dry out your iPhone, it’s important to test it carefully. You need to make sure all features work right to prevent more damage. This step is crucial to avoid any problems.
Safe Power-On Procedure
When turning on your iPhone, do it safely to avoid short circuits. First, make sure it’s dry inside and out. Then, check the Liquid Contact Indicator (LCI) to see if there’s water damage. If it’s dry, you can try to turn it on.
For more on the LCI, visit Apple’s official support page.
Function Tests to Perform
After turning it on, do some tests to see if everything works. First, check the display and touch functionality to see if the screen works right. Then, test the audio components by making a call or playing music.
Also, make sure the Wi-Fi and Bluetooth connections are good. If you find any problems, you might need to get it fixed by a pro.

Dealing with Persistent Water Damage Issues
Dealing with water damage on your iPhone can be tough. Even after trying to dry it out, some problems might stay. You might need to do more to fix it.
Addressing Speaker and Microphone Problems
Water damage can mess with your iPhone’s speaker and microphone. If you hear muffled sound or nothing at all, there are steps to take. First, make sure the speaker grills are clean. Water can push dirt into these areas, making things worse.
You can clean the grills with a soft-bristled brush. If the problem doesn’t go away, you might need a pro to check your iPhone.
Symptoms to watch for: Distorted sound, low volume, or no sound at all.
Troubleshooting tip: Try restarting your iPhone or check for debris in the speaker grills.
Screen and Touch Functionality Issues
Water damage can also mess with your screen. If it’s not responding right or acts weird, it might be due to corrosion or short circuits. Sometimes, just restarting or drying it out can fix it. But, if the problem keeps coming back, you might need a pro to fix or replace the screen.
- Check for visible signs of water damage under the screen.
- Try restarting your iPhone to see if the issue resolves itself.
- If the problem persists, consider seeking professional help.
By tackling these common problems, you might get your iPhone working again. But, if the damage is too bad, you might have to replace it.
AppleCare and Warranty Considerations
Understanding your warranty and AppleCare+ coverage is key when your iPhone gets water damage. This info helps you decide on repairs or replacements.
Apple offers a standard warranty for its devices. But, this warranty doesn’t cover water damage well. Knowing these limits helps you choose the best option for your iPhone.
Does Water Damage Void Your Warranty?
The standard Apple warranty doesn’t cover damage from liquids. So, if your iPhone gets water damage, it might not be covered. Still, check your warranty to see what’s covered in your case.
Checking your warranty status is easy. You can do it on Apple’s website or by calling their customer support. This is important to see if you still have coverage for your device.
AppleCare+ Coverage for Water Damage
AppleCare+ is an extended warranty that includes accidental damage like water damage. With it, you might get a repair or replacement for a lower fee. This depends on how many times you’ve used the service.
To use AppleCare+ coverage, make sure you bought it before the damage happened. Also, check if it’s still active. Reading the AppleCare+ terms and conditions will show you what’s covered and any fees.
Preventing Future Water Damage
Let’s talk about how to keep your iPhone dry. It’s easier to prevent water damage than to fix it. This way, you avoid the trouble and cost of water damage.
By being proactive, you can lower the chance of water damage. This keeps your iPhone working longer and saves you from hassle.
Waterproof Cases and Accessories
Using waterproof cases and accessories is a smart move. They add an extra layer of protection against water. Here are some good options:
- Waterproof phone cases that can handle being underwater.
- Water-resistant screen protectors that keep water out of the screen.
- Port covers that seal the charging port and other openings.
These accessories give you peace of mind, especially if you’re near water a lot.
Behavioral Changes to Protect Your Device
Changing how you use your iPhone can also help. Here are some tips:
- Be careful when using your iPhone near water.
- Don’t use your iPhone in wet places like bathrooms or kitchens.
- Make sure your hands are dry before touching your iPhone.
These habits can help you avoid accidents with water.
Using waterproof accessories and changing your behavior can keep your iPhone dry. This way, you prevent water damage from happening again.
Conclusion: Recovering from iPhone Water Damage
Fixing an iPhone damaged by water needs quick action, the right steps, and patience. By following the guide, you can boost your iPhone’s recovery chances. A user on MacRumors showed how shaking, using a fan, and rice can help.
It’s key to turn off your iPhone, remove accessories, and use proper drying methods. Whether it’s rice, silica gel, or other methods, patience is crucial. Knowing when to get professional help is also important.
Being informed and taking the right steps can help fix your iPhone. For tough problems, getting help from trusted repair services is a good idea.
FAQ
How do I know if my iPhone has water damage?
Look for signs like corrosion, water spots, or condensation inside your iPhone. Check the Liquid Contact Indicator (LCI) to see if it has been triggered.
Can I use a hair dryer to dry out my iPhone?
No, using a hair dryer or any other heat source is not recommended. It can cause further damage to the internal components.
How long should I leave my iPhone in rice to dry out?
Leave your iPhone in a dry environment, like a container with silica gel, for at least 48 to 72 hours. This allows for thorough drying.
Can I fix water damage on my iPhone myself?
While some DIY methods can work, it’s often best to seek professional repair services. This is especially true if you’re unsure or if the damage is extensive.
Does AppleCare+ cover water damage?
Yes, AppleCare+ covers up to two incidents of accidental damage, including water damage, for a fee.
How can I prevent future water damage to my iPhone?
Use a waterproof case and be mindful of your surroundings. Avoid exposure to water whenever possible.
What should I do if my iPhone is still under warranty and has water damage?
If your iPhone is still under warranty, contact Apple support. They will help determine the best course of action for repair or replacement.
Can I use compressed air to remove water from my iPhone’s ports?
Yes, compressed air can be used to remove water from your iPhone’s ports. Just be sure to use it safely and avoid pushing debris further into the device.
How do I test my iPhone after water removal?
Start by powering it on safely. Then, perform function tests like checking the screen, speakers, and connectivity.
What are the signs that DIY water removal methods aren’t working?
Signs that DIY methods aren’t working include persistent issues. These include no power, distorted sound, or an unresponsive touch screen.