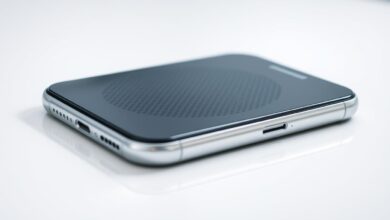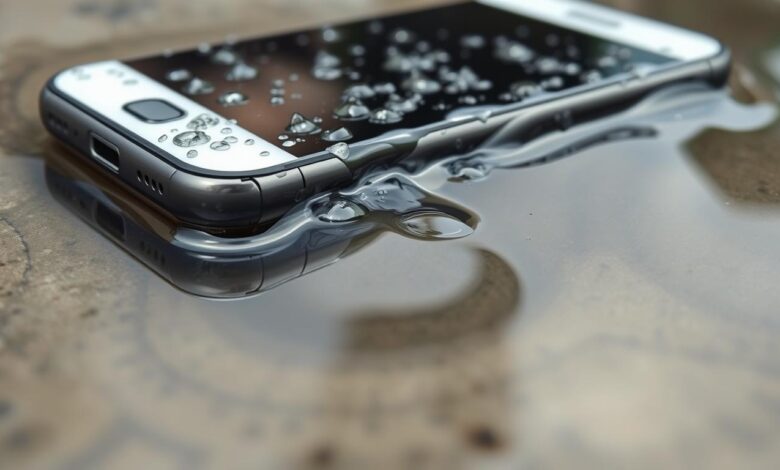
Have you ever dropped your phone in water and heard annoying sounds? You’re not alone. I’ve been there too, feeling the rush of panic when your phone gets wet.
If you’ve dropped your phone in water, this guide is for you. It will show you how to save your phone and stop the sounds from your speakers.
Key Takeaways
- Quick action is crucial to saving your phone from water damage.
- Understanding the steps to dry your phone can help eliminate unwanted sounds.
- Prevention is key to avoiding water damage in the future.
- Simple methods can be used to remove water from your phone’s speakers.
- Professional help may be needed in severe cases of water damage.
Understanding Water Damage to Your Phone
Knowing how water damage affects your phone is key to fixing it right. Water damage can cause small problems or make your phone stop working altogether.
How Water Affects Phone Components
Water can get into your phone’s parts, causing corrosion and damage to the circuitry. This can mess up important parts like the logic board, battery, and connectors. The damage’s extent depends on how long it was exposed and the water type.
Types of Water Damage
Not all water damage is the same. The type of water and how it gets into your phone matter a lot.
Freshwater vs. Saltwater Damage
Freshwater is less harmful than saltwater, which has lots of salt. Saltwater damage is worse and can damage parts faster.
Liquid vs. Humidity Damage
Liquid damage happens when your phone gets wet. Humidity damage comes from being in a damp place for a long time. Both can harm your phone, but in different ways. Liquid damage is quicker, while humidity damage takes longer.
Figuring out what kind of water damage your phone has is important for fixing it. Look for phone water damage indicators to see how bad it is.
Act Fast: Immediate Steps After Water Exposure
When your phone gets wet, every second is crucial. Quick action can greatly lower the chance of permanent damage. It’s vital to take immediate steps to lessen the harm.
Turn Off Your Phone Immediately
The first step is to turn off your phone right away. This stops short circuits that could harm your phone’s inside parts. Avoid turning it back on or trying to charge it until it’s safe.
Remove SIM Card and External Components
Then, take out the SIM card, SD card (if you have one), and other parts. This reduces corrosion risk and lets these parts dry separately. Be careful not to damage anything while removing them.
Wipe Exterior Water Carefully
Use a soft cloth to wipe off any water from your phone’s outside. Be gentle to avoid pushing water inside. Don’t use heat to dry it, as it can harm the inside. Just pat it dry and let it air dry.
Following these steps can help reduce water damage. Remember, acting fast and being gentle are key to your phone’s recovery.
Identifying Water Damage Indicators
Phone water damage repair often starts with understanding the indicators of water exposure. When your phone gets wet, it’s not always clear if damage has occurred. Water damage indicators alert you to potential issues, helping you decide the best repair action.
Locating Water Damage Indicators on iPhones
iPhones have specific indicators that change color when exposed to water. These indicators are usually found in areas like the SIM card tray and inside the charging port.
To check for water damage on an iPhone, look closely at these areas. For example, the Liquid Contact Indicator (LCI) on iPhones is white or silver. It turns red or pink when it comes into contact with water.
Finding Water Damage Indicators on Android Phones
Android phones also have water damage indicators, but their locations vary by manufacturer and model.
Common places to check include the SIM card slot, battery compartment (if removable), and sometimes near the charging port. Always check your device’s manual or the manufacturer’s website for specific guidance on your Android model.
| Device Type | Common Locations of Water Damage Indicators |
|---|---|
| iPhone | SIM card tray, inside charging port |
| Android Phones | SIM card slot, battery compartment, near charging port |
For more detailed steps on saving your phone from water damage, you can refer to resources like 8 steps to save your phone from water.
Understanding and identifying water damage indicators is a crucial step in the phone water damage repair process. It helps you assess the situation and decide on the next steps.
Rice Method: Does It Really Work?
Many of us have heard of using rice to dry out phones after water damage. But does it really work? The rice method is a popular DIY fix, but its success is often questioned.
The idea is that rice absorbs moisture from phones, saving them from water damage. But, it’s important to know the science behind it to see if it’s true.
The Science Behind the Rice Method
The rice method uses rice’s ability to absorb moisture. When a phone is in rice, the rice is supposed to pull out the water. Uncooked white rice is usually recommended because it absorbs moisture better than other types.
But, experts say rice might not work as well as other desiccants. It’s hard for rice to dry all parts of a phone because its components are tightly packed.
Proper Rice Drying Technique
If you choose to use rice, do it right. First, turn off your phone and remove any accessories. Then, put the phone in a container with uncooked rice, making sure it’s fully covered. Leave the phone in the rice for at least 48 hours before trying to turn it on.

Limitations and Risks
The rice method can be a last resort, but it’s not without risks. Rice dust and starch can damage your phone’s internal parts, and rice particles might get stuck in ports. Also, it’s not a sure fix and might not work for all water damage.
As one expert says, “The rice method is more of a myth than a reliable solution. It’s better to get professional help for water-damaged phones.” This shows why DIY methods for water damage phone fix have their limits.
Getting Water Out of Phone Sounds: Speaker Solutions
Water in your phone’s speaker can cause distorted sounds or silence. Luckily, there are ways to get water out and fix the sound. These methods can help restore your phone’s audio quality.
Using Sound Frequencies to Eject Water
Sound frequencies can remove water from your phone’s speaker. This method uses special audio tones to shake the water out. It’s a safe and effective way to fix your speaker.
iPhone Water Eject Shortcuts
iPhone users can use shortcuts to get water out of their speakers. These shortcuts play a specific sound that pushes the water away. This can fix your speaker without needing a professional.
Android Water Eject Apps
Android users can find apps to remove water from their speakers. These apps work like iPhone shortcuts, using sound to clear out water. You can find them on the Google Play Store, often for free or a small cost.
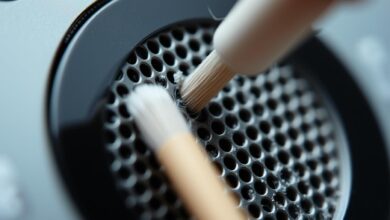
Manual Techniques for Speaker Drying
There are also manual ways to dry your phone’s speaker. Try gently shaking it or using a soft cloth to dab the speaker. Be careful not to damage it further.
Testing Speaker Functionality After Drying
After trying to dry your speaker, test it with different sounds. Check if the sound quality is good. If problems persist, you might need a professional repair.
| Method | Description | Effectiveness |
|---|---|---|
| Sound Frequencies | Using specific audio tones to vibrate water out | High |
| Manual Drying | Gently shaking or blotting with a soft cloth | Moderate |
| Professional Help | Seeking assistance from a professional repair service | Very High |
Clearing Water from Phone Microphones
If your phone’s microphone gets wet, you need to act fast. Water can ruin call quality and voice recordings. It’s key to dry the microphone right.
Signs of Water in Your Microphone
Spotting water in your phone’s microphone is the first step. Look out for these signs:
- Muffled or distorted sound during calls
- Poor voice recording quality
- Intermittent or complete loss of microphone functionality
If you notice these problems after getting water on your phone, your microphone is likely damaged.
Safe Drying Techniques for Microphones
Drying your phone’s microphone needs to be done carefully. Here are safe ways to do it:
- Gently tap the phone to remove any visible water from the microphone area.
- Use a soft, dry cloth to wipe the exterior, being cautious not to push water further into the phone.
- Avoid using heat sources like a hair dryer, as they can damage the internal components.
- Consider using desiccants or silica gel packets to absorb moisture over time.

Testing Microphone Functionality
After trying to dry your phone’s microphone, test it. Make a voice recording or call someone to see if sound quality is better. If not, you might need a pro’s help.
By following these steps, you can fix water damage to your phone’s microphone. You might even get it working again.
Removing Water from Charging Ports
Water in your phone’s charging port needs quick action to avoid damage. It can cause corrosion and stop your phone from charging. This could even harm your phone beyond fix.
Safe Methods for Drying Charging Ports
To dry your phone’s charging port safely, start by gently shaking out any excess water. Don’t put anything into the port to avoid more damage. Use a soft cloth or cotton swab to soak up moisture from the outside.
Desiccant packets or uncooked rice can help dry your phone. Put your phone in a container with the desiccant or rice. Make sure it’s fully covered and let it sit for 24 to 48 hours.
When to Use Compressed Air
Compressed air can help blow out water from the charging port, but be careful. Use short bursts of air to avoid pushing water further. Hold the can upright to prevent liquids from coming out. Remember, compressed air might not work if water has gone deep into the port.
Avoiding Common Charging Port Mistakes
When dealing with water in your phone’s charging port, avoid common mistakes. Don’t use a hair dryer or microwave to dry your phone. These methods can harm internal parts. Also, don’t insert sharp objects or use too much force, as it can damage the port’s inside.
By taking the right precautions and using safe drying methods, you can reduce the risk of damage to your phone’s charging port.
Professional Drying Methods and Tools
When your phone gets wet, quick action is key to avoid damage. If you’ve dropped your phone in water, act fast. Professional drying methods can save your device and make it work again.

Silica Gel and Desiccants
Silica gel and desiccants are great at pulling moisture out of your phone. They help dry out the inside parts, reducing damage. Put your phone in a container filled with these materials, making sure it’s fully covered.
Using Isopropyl Alcohol Safely
Isopropyl alcohol can dry out water in some phone parts, but use it carefully. Make sure to use the right amount and avoid getting it into the phone’s circuits. If done right, it can help your phone work again.
Commercial Water Removal Products
There are many products made to remove water from phones. These include sprays and drying kits. When picking a product, choose one made for your phone type. Always follow the instructions to avoid more harm.
Model-Specific Water Damage Solutions
Knowing your phone model is key to fixing water damage. Each phone is made differently, needing its own fix.
iPhone Water Damage Recovery Tips
iPhones have special signs of water damage, like the Liquid Contact Indicator (LCI). It turns red if water touches it. Quick action and the right drying methods are crucial for iPhones. For more info on repair costs, check this resource.
- Don’t charge your iPhone until it’s dry.
- Use a soft cloth to dry the outside.
- If damage is bad, get it fixed by a pro.
Samsung Galaxy Water Damage Solutions
Samsung Galaxy phones need special care too. Turn off your phone and take out SIM and SD cards right away. They have moisture indicators to show if water damage has happened.
- Take off any accessories and dry with a soft cloth.
- Don’t use heat to dry it, as it can harm more.
- Use desiccant or silica gel to dry it out.
Google Pixel and Other Android Models
Google Pixel and other Androids need different fixes for water damage. Always check the user manual or the manufacturer’s website for advice. Most Androids have similar signs of water damage and need fast action.
Some important steps include:
- Turn off your device right away.
- Dry the outside carefully.
- Get professional help for big damage.
Understanding your phone’s specific needs helps in fixing water damage. This way, you might save your device from lasting harm.
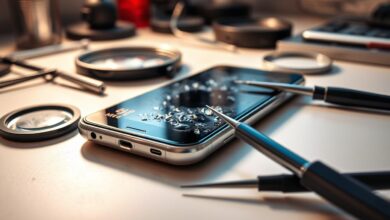
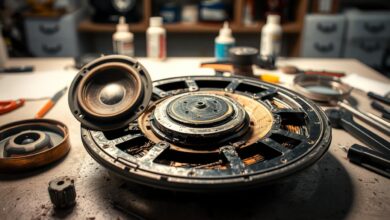
Repairing Water-Damaged Phone Components
Fixing a water-damaged phone needs different repair strategies. Water damage can be minor or severe, affecting many parts. Knowing the damage’s extent is key to choosing the right repair.
First, check the damage. If your phone was turned off and dried quickly, some parts might still work. But, some parts are more likely to be damaged by water.
DIY Repair Options for Minor Damage
For minor damage, fixing it yourself can save money. If the damage is just on the outside or surface, you can do it. Common DIY fixes include cleaning charging ports and replacing SIM card trays or screens. You’ll need basic tools like a screwdriver, tweezers, and a soft brush. Work in a well-lit area and use anti-static precautions to avoid more damage.
When doing DIY repairs, follow the right steps to avoid making things worse. Use the right cleaning solutions and avoid harsh chemicals. Sites like iFixit have guides for different phones, helping you through the repair.
When to Seek Professional Repair
For more serious damage, you’ll need a pro. If water got inside your phone, you’ll likely need a pro to fix it. Experts have the tools and know-how to fix complex problems, like damage to the logic board.
Signs you need a pro include problems after trying DIY fixes, like charging issues or a broken screen. If DIY repairs scare you or your phone is still under warranty, get a pro.
Cost Considerations for Repairs
Repair costs vary based on the damage and the repair method. DIY fixes are cheaper, but pro repairs can be more expensive. This is especially true if you need to replace big parts.
Think about the cost before fixing your phone. For older phones, fixing might cost more than the phone’s value. But for newer phones, fixing can save money and extend your phone’s life.
Preventing Future Water Damage
The best way to handle water damage is to stop it before it starts. We’ve talked about fixing water-damaged phones, but preventing damage is better. It saves you time, money, and the stress of a broken phone.
Using waterproof cases and accessories is a great way to protect your phone. They add an extra shield against water spills or drops. Make sure your waterproof case fits well and is highly resistant to water.
Waterproof Cases and Accessories
Waterproof cases keep your phone dry, even when it’s underwater. They come in many styles, from slim to rugged. Brands like LifeProof, Catalyst, and OtterBox are popular. You can also use waterproof pouches or bags for extra safety near water.
Water Resistance Ratings Explained
It’s important to know about water resistance ratings when buying a phone or case. IP68 is a common rating, meaning the device can handle being underwater. But, the depth and time it can stay underwater differ by brand. Always check the details.
Everyday Precautions
There are simple steps you can take every day to protect your phone. Stay aware of your surroundings to avoid water risks. Keep your phone away from the bathtub edge, avoid using it near water, and be careful in the rain. These precautions can greatly lower the chance of water damage.
By using these strategies, you can enjoy your phone without worrying about water damage. Whether you’re near water or just want extra protection, these steps help keep your phone safe and working well.
When to Replace vs. Repair Your Water-Damaged Phone
When your phone gets wet, you face a big choice: fix it or get a new one? This choice depends on how bad the damage is and how much it will cost. It’s key to think it over carefully.
Assessing the Extent of Damage
First, see how much damage your phone has. Look for signs like corrosion or mineral buildup. Also, check the phone water damage indicator to see if water got inside. If the damage is small and you dried it out fast, fixing it might work.
But, if your phone was fully underwater or wet for a long time, the damage is probably worse. In these cases, fixing it might cost too much, so getting a new phone might be better.
Cost-Benefit Analysis of Replacement
When deciding to fix or replace your phone, think about the costs. Compare fixing your phone to buying a new one. If fixing it costs more than half of a new phone’s price, it’s likely cheaper to get a new one.
“The average cost of fixing a water-damaged phone can be from $50 to over $300, depending on the damage and phone model.” This shows how important it is to get a professional’s opinion before deciding.
In the end, whether to fix or replace your phone depends on the damage and cost. By carefully considering these, you can choose what’s best for you and your wallet.
Conclusion
Getting water out of your phone is urgent and needs the right steps. This guide helps you save your device and fix water out of your phone’s speakers. Using a phone case with a finger loop, like the Wall-E, can also prevent drops that lead to water damage.
Protecting your phone further means using waterproof accessories and staying alert near water. Quick action and being ready can protect your device.
By being proactive and knowing how to handle water damage, you can feel secure. This way, you reduce the risk of damage to your phone.
FAQ
What are the signs of water damage in my phone?
Signs include distorted sounds, no sound, or corrosion. Look for water damage indicators on your phone. These are usually on the SIM card tray or inside the charging port.
How do I get water out of my phone’s speakers?
Use sound frequencies to eject water. Or, try shaking your phone gently or using a soft cloth. There are also iPhone and Android apps for this.
Can I use the rice method to dry out my water-damaged phone?
The rice method might work, but it’s not guaranteed. Place your phone in a container of rice, covering it fully. But, be careful of rice dust getting into your phone’s ports.
How do I dry out my phone’s charging port?
Use compressed air or a soft cloth to remove water from the charging port. Avoid sharp objects or inserting anything, as it can damage your phone further.
What should I do if my phone’s microphone is not working after water exposure?
Dry the microphone with a soft cloth or desiccant. Test it by making a call or recording a voice note.
Can I repair my water-damaged phone myself?
For minor damage, DIY repairs like cleaning corrosion or replacing parts might work. But, for serious damage, it’s best to get professional help to avoid more harm.
How can I prevent future water damage to my phone?
Use a waterproof case or accessories. Understand your phone’s water resistance rating. Be careful when using your phone near water.
Should I replace or repair my water-damaged phone?
Decide based on the damage and repair costs. Assess the damage and consider the cost-benefit. Choose what fits your needs and budget.
What is the water damage indicator on my iPhone or Android phone?
It’s a small indicator that changes color when wet. It’s usually on the SIM card tray or inside the charging port. It helps you see how much damage there is.
How do I know if my phone is water damaged?
Look for signs like distorted sounds, corrosion, or water damage indicators. If unsure, get a professional to check.